Generate email with embedded images
This section will show how to automate the creation of an email with embedded images.
| 3. In the new action window click the top dropdown and select 'Send email with files, images or database data': |  |
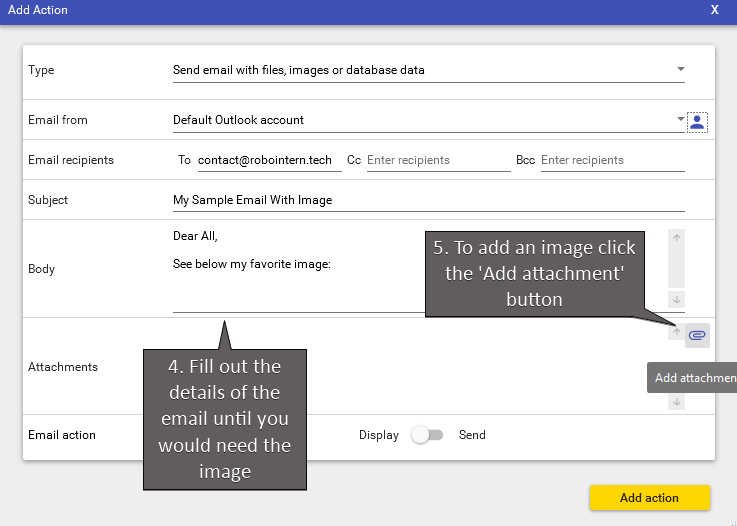
| 4. Fill out the details of the email until you would need to add the image. Then click the 'Add attachment' button on the right: |  |
| 5. Select the image button at the top, enter the file path and add a tag that is to be used for it in the email body. Finally click the 'Add attachment' button: |  |
| 6. An entry for the image will now show up in the attachments list. Now enter the tag to the desired part of the email and finish the text. Once everything done click the 'Add action' button: |  |
And that's it!
For more advanced tasks and automatic (time or event based) scheduling please see other sections of the how-to guide.
Happy automation!


